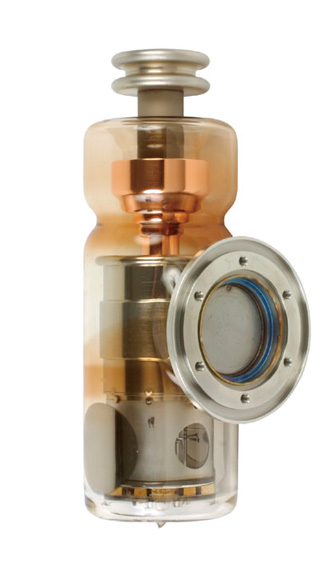
X-ray Tube
Industrial X-ray Tubes
Below information is purpose for of development, design and production of industrial inspection systems by implementing our company's products. Technical and regulatory confirmation/verification is necessary before purchasing and using of these products.
Industrial X-ray tubes are marked "I" and a variety of tubes are manufactured for each of the applicable fields (nondestructive testing, coating thickness gauging, etc.) Vacuum envelopes for industrial X-ray tubes are made of glass or ceramic. Ceramic envelopes are particularly strong mechanically, and this enables Canon Electron Tubes & Devices to offer X-ray generators with outstanding portability and operability.

Lineup
Click photo to enlarge.
| Image | Model Name |
Target Material |
Focal Spot (mm) |
Max. Rating (W) |
Max. Voltage (kV) |
Max. Current (mA) |
Circuit | Ground | Target Angle (°) |
Be Thickness (mm) |
Dimensions Length x Diameter (mm) |
Appli cation |
Down load |
|---|---|---|---|---|---|---|---|---|---|---|---|---|---|
| - | I-221 | W | 1 | 150 | 50 | 5 | C | CG | 20 | 0.5 | 176×40 | F |
(181KB) |
| - | I-2118B | W | 1×0.7 | 55 | 55 | 1 | C | N | 20 | Glass1.7 | 96×30.5 | F |
(157KB) |
| - | E7690 | W | 1×1 | 350 | 75 | 8 | C | CG | 20 | 1 | 185×62 | F |
(225KB) |

|
I-2112B | Rh | 0.8 | 50 | 50 | 1 | C | CG | 33 | 0.05 | 96×33 | A |
(182KB) |

|
I-2113A | Mo | 0.15 | 75 | 50 | 1.5 | C | CG | 10 | 0.05 | 96×33 | A,T |
(163KB) |
| - | I-2115C | W,Mo | 0.15 | 75 | 50 | 1.5 | C | CG | 10 | 0.2 | 96×33 | A,T |
(168KB) |

|
I-2122A | W | 0.15x0.1 | 50 | 50 | 1 | C | CG | 16 | 0.2 | 96×30.5 | A,T |
(172KB) |

|
I-2123 | W | 0.1 | 50 | 60 | 1.2 | C | CG | 10 | 0.2 | 96×30.5 | N |
(166KB) |
| - | I-317 | W | 0.1 | 50 | 100 | 0.83 | C | CG | 10 | 0.5 | 180×62 | N |
(170KB) |
| - | I-318 | W | 0.8 | 300 | 100 | 5 | C | CG | 25 | 1.5 | 180×59 | N |
(163KB) |
| - | I-513 | W | 0.8 | 300 | 160 | 7 | C | CG | 25 | 1.5 | 180×59 | N |
(197KB) |
- Notes
- Circuit : C=DC1, S=Self Rectification
Ground : AG=Anode Ground, CG=Cathode Ground, N=Center Ground
Application : T=Thicknessmeter, A=Analysis, N=Nondestructive, F=Food Inspection
*1 : Focusing bias, *2:Ceramic Tube, *3 : Input peak power(1pulse), *4:Pulse
Inquiry About Products
USA:+1-800-970-7227
Europe:+31-20-399-9087
Japan:+81-44-739-6502
China(Shanghai):+86-21-6361-0077
China(Beijing):+86-10-8525-8277

